Friday, June 29, 2012

Nutritional Tip from Hazel

BBQ Tips to Prevent Cancer

Many people avoid BBQ foods because the are worry about the cancer risk. However, although the risk is real, it can be greatly reduced by changing the way you do it and the food you choose to grill.

The risk comes from HCAs – Heterocyclic amines, which is a cancer-causing compounds formed by combining HIGH heat and muscle proteins of the red meat, poultry and seafood. Consumption of HCAs is linked to cancers of colon and stomach.

Here are some tips for you to enjoy your BBQ foods without needing to worry about your health.

  1. Turn the gas down and raise the grilling surface from the heat source to lower the cooking temperature. This can avoid the black char that can form on meat. The carcinogen content in the char is extremely high.

  2. Marinating and flipping meat often. Marinating can decrease HCA formation by up to 96 percent according to the American Institute of Cancer Research.

  3. Grill leaner cuts of meat that will drip less and cause less smoke. Fats on the meat melt under high heat and turn into grease. As the grease drip onto the red hot charcoal, lots of smoke arise which consists of another cancer-causing compound called polycyclic aromatic hydrocarbons-PAHs. Therefore, do not just focus on your red meat - beef, pork, lamb, and sausages/hot links at the BBQ but try using Chicken and Fish as other options.

  4. If you really enjoy red meat, try making kabobs. The smaller pieces of meat reduce cooking time and you can include more vegetables on the kabobs.

  5. Try grilling vegetables and fruits as they do NOT form HCAs. Also, fruits and vegetables contains cancer-fighting nutrients and phytochemicals which stimulate enzymes that can convert HCAs to an inactive, stable form that is easily eliminated from the body.

Interested in learning about weight goal and nutrition needs?
Schedule a free body weight and fat% analysis with Hazel at 626-283-5128 or email tohazel@smarteater.net.

Wednesday, June 27, 2012

Shirley Corriher's Touch-of-Grace Biscuits

My sister, Maggie, was here from Portland over the weekend and she sent me this recipe so we made them.... they were cakey but really good. So the following is the actual article and video that she sent me.

SHIRLEY CORRIHER'S TOUCH-OF-GRACE BISCUITS

Every week, Food52's Senior Editor Kristen Miglore is unearthing recipes that are nothing short of genius.

Today: Never again suffer a dry biscuit, thanks to food scientist Shirley Corriher (and her grandmother).

touch of grace biscuits

- Kristen

The number one problem with biscuits, if you ask anyone who cares about biscuits, is getting stuck with one so pasty and dry that no slather of butter or jam can redeem it. It's as bad as being presented with a trampled-looking well done steak, when you ordered medium rare. Maybe worse.

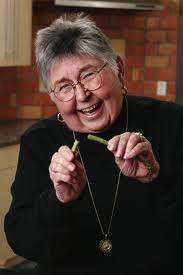
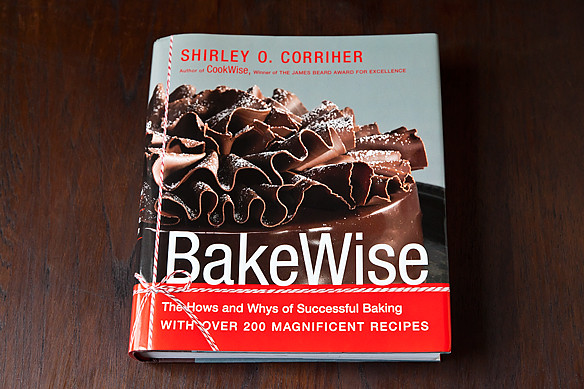
A foolproof solution comes to us from none other than Shirley Corriher -- chemist, baker and author of CookWise andBakeWise -- who recreated her grandmother's technique after too many problem biscuits of her own. (Granny said to add "a touch of grace", and an iconic recipe was born.)

shirley corriher bakewise

So: the answer to dry biscuits? Make them wet. Really, really wet. If you take a suspiciously moist batter and put it in a hot oven, you get steam, which puffs up the biscuits and makes them airy inside, while still sizzling up a great crust.

They're downright meditative to assemble -- after pinching together the dry ingredients with a bit of shortening (or butter or lard, for you purists), you stir in cream and buttermilk until it looks like cottage cheese, per Corriher's instructions. "It should be a wet mess," she says.

touch of grace biscuits touch of grace biscuits

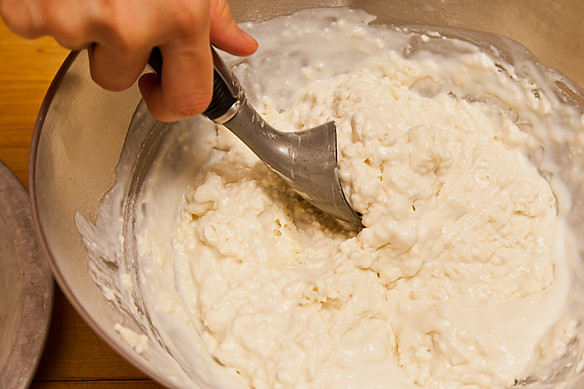
So even if your spooned-and-leveled cups of flour turn out to be more loaded than Corriher's, or it's a humid day (two things that can really affect the outcome of batters and doughs), you'll still be okay -- because you just keep pouring and stirring until it looks like something that couldn't possibly stand up and become a biscuit.

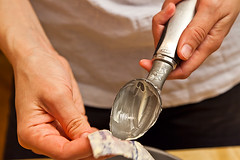
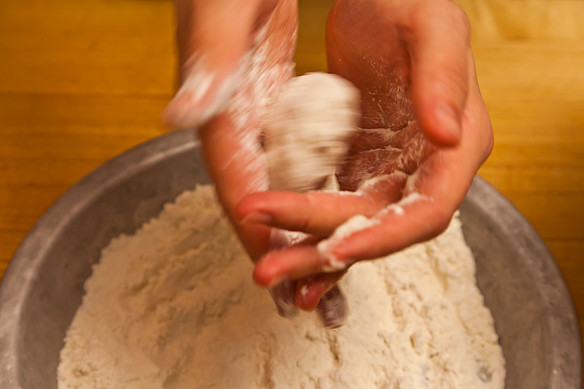
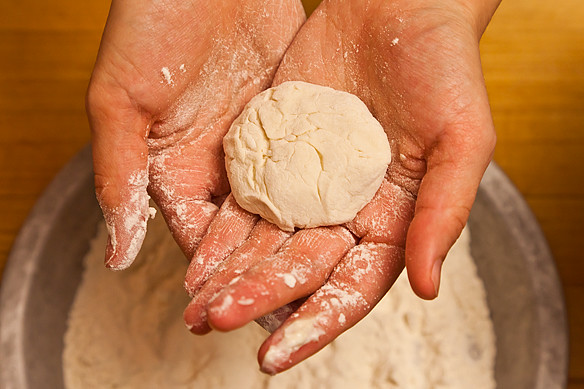
What keeps the biscuits from spilling all over is this fun step: you plop your batter (from an ice cream scoop!) into a pie plate full of flour, then toss it all around and let the flour fall through your fingers until you're left with just a lump of dough bound together by a thin skin of flour. (Don't wear black -- you're going to get floured.)

shaping biscuits touch of grace biscuits

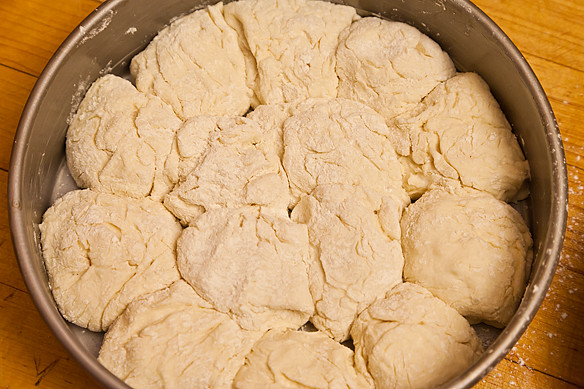
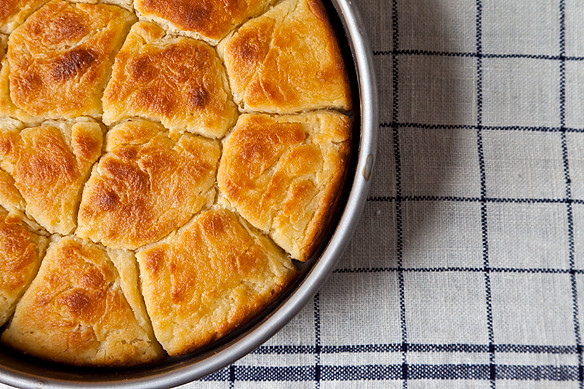
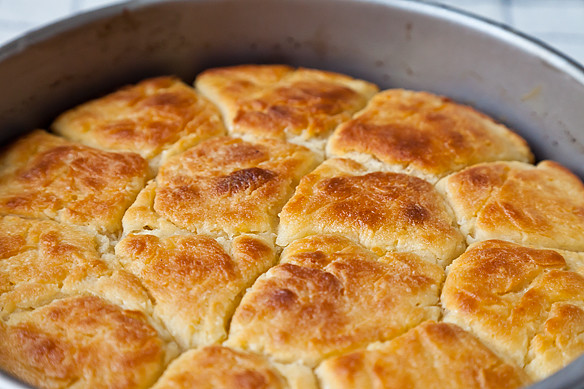
Then you roll them into your buttered cake pan, nudging them all up against each other, so none have a chance to fall flat. They get steamy, soft middles while the tops and outer edges turn coppery and crisp. (See a great video of Corriher demonstrating the technique here.)

touch of grace biscuits touch of grace biscuits

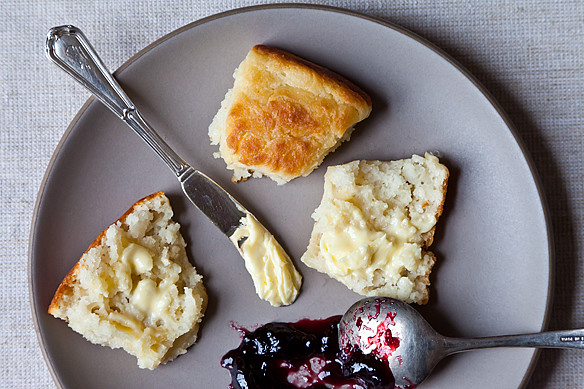
Be warned: these are not your tall, proud, layer-upon-flaky-layer biscuits. Those are their own animal, and require thoughtful folding and cutting. Corriher's are a humbler beast, but just as good (and arguably much easier to throw together).

They're squat little puffs you'll want to grab, steaming, from a basket passed over fried chicken or bacon and eggs. You'll want to make them with your kids. You'll want to whip them up, and then tear them apart, with unexpected guests. You'll want to turn to them when you're alone and in the mood for biscuits, because they're so moist, they're actually still good after a day or two, with a quick warm-up in the oven. And you'll definitely want to pour gravy all over them.

touch of grace biscuits

Shirley Corriher's Touch-of-Grace Biscuits

Note: Corriher, ever the scientist and tinkerer, published one version of this recipe in CookWise in 1997, and a fairly different one in BakeWise in 2008. We tried and loved both, the newer one edged out (she knows her tinkering).

Makes about 12-14 medium biscuits

Adapted slightly from BakeWise: The Hows and Whys of Successful Baking (Scribner, 2008)

Butter for greasing, or nonstick cooking spray
2 cups (9 oz/255 g) spooned and leveled self-rising flour (low-protein Southern U.S. flour like White Lily or any self-rising flour)
1/4 cup sugar (or less, if you prefer your biscuits less sweet)
1/2 teaspoon salt
1/4 cup shortening
2/3 cup heavy cream
1 cup buttermilk, or enough for dough to resemble cottage cheese (if you are not using low-protein flour, it will take more than 1 cup)
1 cup plain all-purpose flour, for shaping
3 tablespoons unsalted butter, melted, for brushing

See a slideshow and the full recipe (and save and print it) here.

touch of grace biscuits

Want more genius? Try Ann Seranne's Rib Roast of Beef

Got a genius recipe to share -- from a classic cookbook, an online source, or anywhere, really? Please send it my way (and tell me what's so smart about it) at kristen@food52.com.

Photos by James Ransom

YouTube - Videos from this email

Wednesday, May 30, 2012

Apricot Tart


Every summer the apricot tree that my Dad, Walter planted in the backyard produces at bumper crop of this wonderful tasting stone fruit.  This year the little apricots were not so little.  They were quite huge and so plenty.  So the proverbial apricot jam has been made and shared with the neighborhood and work.  I am trading apricot for strawberry with my nephew, John, if he remembers.  This year I made a summer peasant apricot tart.  Home made crust too.  Quite easy crust with the Cuisinart.

So here goes:

Short Crust Pastry
1  1/4 cups all-purpose flour
1/2 tsp salt
1 tbls granulated white sugar
1/2cups unsalted butter, chilled, and cut into small/medium pieces
1/8 cup to 1/4 cup ice water

Apricot filling:
1 1/2 pound apricots...  8 to 14 apricots.... cut in half a pitted
1/3 to 1/2 cups white sugar
1/8 tsp salt

Crust:  In a food processor, pace the four, salt ad sugar and process until combined.  Add the butter and process until the mixture looks like corn meal.  Add the water slowly in a steady stream through the feeding tube of the processor until the pastry just holds together.  (To make sure the water is chilled I put a couple of ice cubes in the water).

Turn pastry out onto floured surface.  Roll out into a 12 inch circle.  Place parchment paper on a cookie sheet and place the dough on parchment paper.  Set aside.

In a large bowl mix together apricots, sugar and salt.  Mix until apricot juice starts to cling to fruit.  Sugar will become a little pasty.  That's perfect.  Pour apricots and juice onto the middle of the dough
and place them flat side down leaving about a 2 inch border.  Gently fold the edges of the pastry up and over the apricots, pleating when needed.  Make sure to seal any cracks in the pastry.

Bake the tart in a preheated 405 degree oven for 35-45 minutes or until pastry in golden brown.  remove from oven and place on a wire rack to cool.  Serve with vanilla ice cream.

Very tasty...and so easy-peasy!


Thursday, April 26, 2012

Mousse au Citron


Mousse au Citron

My friend Erin and her Mother, Colleen, came over for lunch the other day.  We were celebrating Colleen's birthday.  Of course, I made a Spinach and Ham quiche and my famous French Onion Soup. However, for dessert instead of the usual chocolate torte I decided on something with lemons because I have a lemon tree that is full.  I found this recipe for lemon mousse in the Saveur magazine.  It took 2 days...started on Monday and finished on Tuesday.  But it was good...a little heavy but good.

Mousse au Citron

serves 8 - 10  

8   eggs
1  1/4 cups sugar
1/2 tsp. salt
Juice and zest of 4 lemons
1  cup heavy cream
1  tsp. vanilla extract

Whisk together 4 eggs, 4 yolks (reserve remaining whites), and 1 cup sugar in a 4 qt saucepan.  Add salt and juice and zest; stir until smooth.  Place saucepan over medium heat; cook stirring, until mixture thickens to the consistency of loose pudding, about 10 minutes.  Pour through a fine strainer into a large bowl and chill.

Next Day:
Whisk egg white and remaining sugar n a bow until stiff peaks form:  add to curd.  Fold gently until combined: set aside.  Which cream and vanilla in a bowl until stiff peaks form: add to curd mixture.  Fold until combined.  Spoon mousse into serving cups: chill before serving.

It was really tasty "cool" but filling.  No wonder it serves 8 to 10.  But worth the time.

So enjoy...

Monday, April 23, 2012


Ingredients for French bread baguette recipes:

4 cups Flour
1 tbsp. Dry Active Yeast
1-2 tsp. Salt
2 cups Warm Water
Oil for bowl

How to make it:

1. In a bowl, mix together the flour and the salt.
2. In another bowl, combine yeast, warm water, and half of the flour/salt mixture. Using your hands, mix until it forms a dough. Then, cover with a dish cloth and let sit at room temperature for 3 hours. It should triple in size.
3. Gently incorporate the rest of the flour/salt, using your hands.
4. Place on a lightly floured surface and knead for about 10 minutes. It should be supple and elastic when you stop kneading.
5. Lightly oil a bowl. Place dough in bowl. Cover with a dish towel. Let sit for 1 hour. It should double in size.
6. Preheat oven to 450°F. Knead again. Then cut dough into 3 parts and form each part into a long baguette. Place on a baking sheet. Let sit for at least 20 minutes.
7. Place a bowl of water in the oven. Bake baguettes for about 25 minutes (maybe less). Remove the bowl of water after 15 minutes of baking.
VoilĂ !

Tip for French Bread Baguette Recipes:

Baguettes are particularly crusty and light because they are cooked at extremely high temperatures and are vaporized. Even though domestic ovens can't go as high a real French bakery ovens, you can still make an excellent baguette, by remembering to put a bowl of water in the oven. And, of course by baking at a very high temperature.

Tuesday, April 17, 2012

Tilapia with Shrimp in a pouch


Something oh so easy and good tasting and an old Boy Scout way of cooking on an open fire. However, I used the oven. My neighbors Judy and John came over for dinner the other night and I made talapia. Easy to do....

3 talapia fillets
18 medium shrimp, cooked or uncooked
butter
salt
pepper
paprika
dried parsley

Okay that is it. 3 pieces of foil.... spray each piece of foil with cooking spray. Place
one fillet in the middle of foil, put 2 tabs of butter on top of fish. Add 6 shrimp, salt, pepper, dried parsley and paprika for taste. Take long end of foil and touch together and fold foil over twice. Then fold in each side. Puncture 3 holes on top of foil to stream can release. Place on a cookie sheet and place in a pre-heated 350* oven. Bake for 30 minutes.

Place on plate and carefully undo the folds or cut down the middle but be careful steam will release and it is hot. Enjoy... fish is flaky and tender and not fishy tasting.

You can also add mushrooms, asparagus, small potatoes to the pouch.

I love this way to cook. You can pre-make the pouches ahead of time in the morning and then when you get home take them out for about 15 minuted before you cook them...while oven is preheating.

You can also place these on the BBQ using the heavy duty foil. So easy and non-messy for parties. And, your guests will love the whole pouch idea....

Easy-peasy....and tasty too!!!!

Monday, April 2, 2012

Sage-Rubbed Pork Ribs with Sauteed Cabbage


Hello and sorry for being so long in a new recipe but I have been busy settling in to my new routine with a new part time job that is on the weekends. So I have had to change my cooking habits to during the week instead of the weekend because when I get home from Armstrong's garden Center I am exhausted and can barely move.

Sage-rubbed pork ribs from the Weekend Magazine, is this weeks try. The recipe called for pork chops but summertime pork ribs boneless were in the discount pile at Vons and they looked really good. Meaty and not much fat. So I used them instead.

2 pork ribs, boneless or 2 pork chops
1 tbls chopped fresh sage or 1 tsp dried (I have sage in my kitchen garden)
1 large clove of garlic minced (I used 3 since I love garlic)
1/2 tsp salt
pepper
2 tbls. olive oil

1/4 head cabbage, sliced thin


Combine all ingredients, except olive oil in a bowl. Wash ribs/chops and pat dry. Rub mixture all over meat and set aside for 15 minutes. Preheat a iron skillet, and olive oil and then add the meat. Sear on one side for 5 minutes, turn and sear on other side for 4 minutes. Remove meat and place on an oven proof plate, cover with foil and place in oven to rest.

Add, a tad more olive oil and butter and sliced cabbage. Add a splash of seasoned rice wine vinegar. Cook cabbage until wilted. About 10 to 15 minutes.

Place cabbage on plates...place ribs/chops on top of cabbage.

It was really good. The pork was juicy since it was allowed to sit for 15 minutes. It was just barely pink inside. Remember, "resting" meat still continues to cook. I would add applesauce on the side for this dish next time I make it.

There you have it easy-peasy!